Quick and Easy Paper Lei
Aloha, crafters! If you're in the mood for some tropical fun, why not dive into the luau spirit by crafting your very own homemade lei? It's a delightful paper project that's sure to brighten up any gathering.
Aloha, crafters! If you're in the mood for some tropical fun, why not dive into the luau spirit by crafting your very own homemade lei? It's a delightful paper project that's sure to brighten up any gathering.
DIY Paper Lei
Materials & Supplies
- Colorful Paper
- Scissors
- Hole Punch
- String
- 3 Paper Straws
- Flower and Leaf Template
- Optional: #TableSettingIsMyLife Template
- Bonus: Crafting Tunes 🎵 Check out our crafting playlist on YouTube.
Step 1 Cut It Out
Begin by printing and cutting out the flower and leaf templates. Use these templates to trace and cut shapes from your colorful paper.
I opted for two shades of pink cardstock for the flowers (one light pink sheet and two dark pink), and two shades of green for the leaves. Ensure you maximize the number of flowers and leaves on each sheet. The more flowers - the merrier!
Step 2 Punch and Curl
With all your pieces cut, use the hole punch to create a hole in the center of each flower and at the bottom of each leaf.
Step 3 String it Together
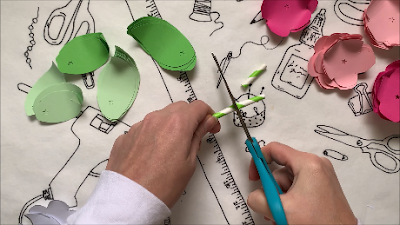
Cut your paper straws into 2-inch pieces. I used approximately three straws for my lei. Begin threading the straws, flowers, and leaves onto your string, following a repeating pattern: straw, leaf, flower, flower, leaf, straw.
Aloha! Your done.
Music for Crafting
Here's a 30-second visual guide to the instructions, accompanied by lively Luau music to entice your crafting spirit.


.png)


.jpg)