
But I'm Crazy About You, You Butterfly!

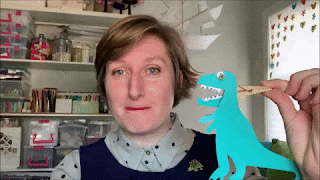
Get ready to spread your wings and let your creativity soar with this fluttering butterfly project! Follow these step-by-step instructions to bring your own little flying friend to life.
DIY Fluttering Butterfly
Materials Needed
- Coloring Supplies (crayons, markers, or colored pencils)
- Scissors
- Wooden Dowel (or a similar stick)
- Paper Straw
- Tape
- Butterfly Drawing or Template: #TableSettingIsMyLife Butterfly PDF
.png)
Step-by-Step Instructions
.png)
Step 1: Color and Cut Your Butterfly Template
Begin by coloring in your butterfly template. Be as creative as you like with your color choices. Color the wings and two body pieces. Then cut all the parts out.
.png)
Step 2: Assemble the Butterfly Body
Take one of the two butterfly body pieces and tape it securely to the wooden dowel, positioning the stick in the center of the body.
.png)
.png)
Step 3: Attach the Wings
.png)
Step 4: Prepare the Paper Straw
.png)
Step 5: Create the Flapping Motion
.png)

Step 7: Bring Your Butterfly to Life
Now, gently move the straw up and down along the wooden dowel to make your butterfly flap its wings. You did it, you crafting legend. Now go watch as your beautiful creation comes to life, fluttering gracefully in the sky!
Share Your Creation
We’d love to see your colorful butterflies in action! Share your completed project with us in the comments below or on social media. 🦋
Bonus: Crafting Tunes 🎵 Check out our crafting playlist on YouTube.
Here's a 30-second visual guide, accompanied by inspirational music to entice your crafting spirit.
Check out our other butterfly templates: #TableSettingIsMyLife Butterfly Template

For more totally family friendly crafts, check out our previous Crafts with Katie posts.
Join the Fun: Embrace Everyday Joy
Born out of a call to help our local library during lockdown, these crafting videos provide full step-by-step guides to fun and engaging craft projects. Whether you're a seasoned artist or just looking for a delightful way to spend an afternoon with the family, these videos are designed to inspire and entertain.
 For those who want to craft along with me, be sure to visit my Etsy store where you can purchase craft kits containing all the materials you need for each project. Let's get creative and make something amazing together!
.png)
For more totally family friendly crafts, check out our previous Crafts with Katie posts.
.png)
.png)


.png)

